Your most secure, reliable, and fast OpenBanking platform. Enjoy with the sample codes, and a robust support system help you deploy confidently and reducing glitches.
To start the onboarding process in the sandbox environment and get an access to the Dev-Portal you need to go to Signup button in our website and fill the required information or you can use the below link : https://onboarding-sandbox.datainsights.sa/register
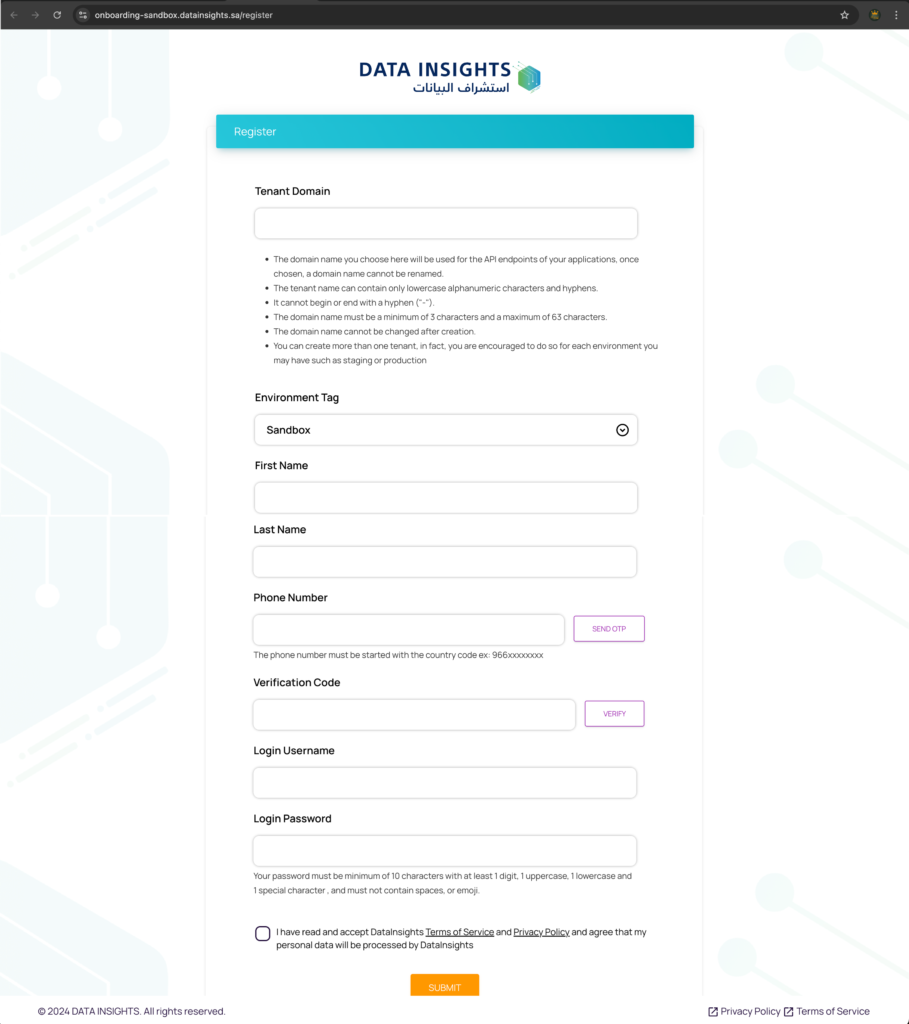
when you open the link the registration form will be opened as below :
The registration form contains below required fields:
Tenant Domain : your organization name or any custom name related to your org will be used to access the dev-portal and in the APIs and SDK.
Environment Tag: Used to set the environment and identify where you will be register in which environment.
First Name: The account owner user first name.
Last Name: The account owner user last name.
Phone Number: The account owner phone number. note : must be a Saudi Arabia phone SIM number.
Verification Code: The received one-time-password (OTP) at the account owner phone number.
Login Username: The login username used to login in the Dev-Portal.
Login Password: The login Password used to login in the Dev-portal.
After finished filling the required information you need to accept the Terms of Service and Privacy Policy and press on the SUBMIT button to complete your registration once the registration is completed you will receive SMS message contains registration status and instructions about the created domain for your tenant and in UI will show you the registration status also like below .
To Access the Dev-Portal you need to open the dev-portal domain which is will be “tenant@datainsights.sa” you can find your tenant dev-portal domain in the received SMS at your used phone number in registration process.
Please Note: Once the registration is completed successfully you need to contact us and open a ticket for the support team to create DNS record for your registered tenant domain so you be able to access the dev-portal and login. To open a ticket please open the Help Center and Submit a request . Once the DNS record for your tenant domain is created will notify you so you can access the dev-portal. below screen shows the submit request form details.
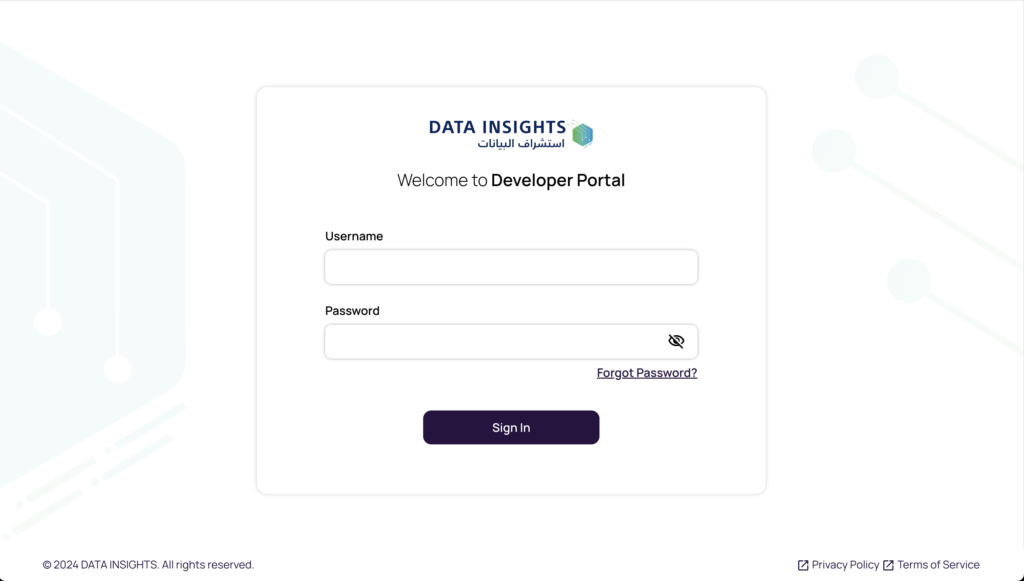
Open the Dev-portal and below screen will be shown:
Enter the Login username and Login password and press on Sign In button then the OTP screen will be shown and you will receive an OTP code at your registered phone number below the OTP verification screen.
After you entered the OTP code press on the Verify button if the OTP code is correct then the Dashboard screen will be opened as below :
# Create New Application – you need to create and application to get the client-credentials for your app so you can access the required service, to create new application follow below steps:
From the left side menu open the Applications then an application list screen will be shown which is list all created application with create application (+Add New) option can be founded at right top corner as below screen shows.
Press on + Add New button to create new application after you press on it then the create application form will be opened as below:
The create new application form contains below required fields:
English Name: Enter the application english name .
Arabic Name: Enter the application arabic name.
Legal English Name: Enter the application legal english name this is will be shown to the user in the consent agreement screen.
Legal Arabic Name: Enter the application legal arabic name this is will be shown to the user in the consent agreement screen.
Brand Id: Registered brand id for your application.
Description: Application description details about the application.
Privacy Policy Link: The application privacy policy link will be returned in the consent details so the user can view it.
Terms of Service Link: The application terms of service link will be returned in the consent details so the user can view it.
Subscription Webhook URL: The webhook URL will be used to notify you about the consent event (changes).
Redirect URL: The application redirect URL used to return the result of the consent status.
API Set: The API set can be (AIS) Account Information Service or (PIS) Payment Initiation Service (coming soon).
Purpose Type: The purpose type represented the target customer account if you want to target the individual bank accounts select retail if your target accounts is corporate then select corporate.
Purpose Code : The purpose code is a set of use-cases that is provided as a service according to the selected purpose type if the selected purpose type is a retail then the purpose code will show list of the use-cases that target the retail bank accounts and if the selected purpose type is corporate then the list will be shown that is target the corporate bank accounts.
Status: The application statusindicate if the application is enabled or disabled.
After you filled the required details press on the Save buttonto create the application once the application is created you can find the application client-credentials in the application details screen, for more details check below screens.
Once you got the Application Client Credentials you can use it in our OpenBanking API Gateway for more deatils you can check the APIs docs from theAPIs Integration Docs .
# Manage Financial Institutions – You can manage the financial-institutions and control if you want to enable/disable the financial-institutions status which is allow you to show/hide it from your application and you can update the financial-institutions logo according to your needs.
Open the Financial Institutions from the left menu
Press on the View button to view the financial institution details
Mange the financial institution as you need and press Save
Below screen show you more details.
For more details and support please contact us on the below email or use the Help Center.
Production Onboarding Registration Process: To move from sandbox environment to production environment submit a request in our service-desk system using (submit a request) or by reaching us at support@datainsights.sa email.